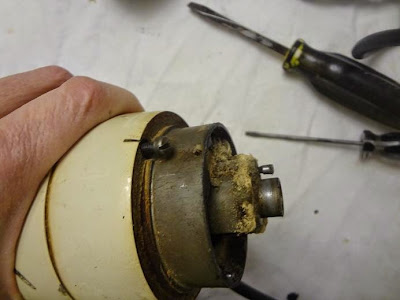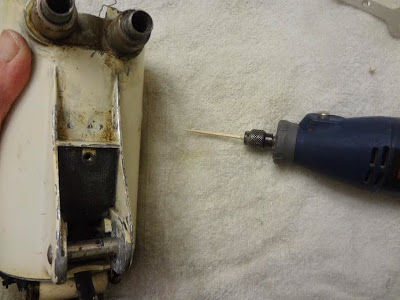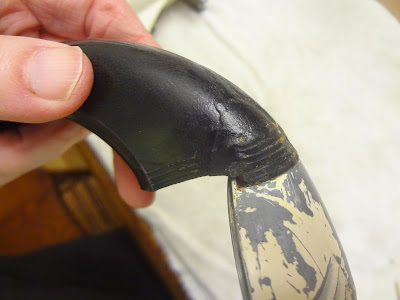
...amongst those things was this old mixer...it still worked and it's about the only thing that we kept... ...so for Christmas the boys got me the stand for it... ...and it fit perfectly... ...then I found these beaters on ebay...and we were good to go...stand...mixer...beaters...I already had a bowl...but it's really not very pretty is it?... ...so I printed out a schematic...it's for a model 10 and ours is a model 9...but pretty close... ...I got out some tools... ...and started taking things apart... ...pictures of the process help in the reconstruction...like this little spring...that feeds through the little loop on the bottom...I have lots of technical terms like that since I have no idea what I'm doing... ...the next layer was a grease cover and gasket... ...which revealed the gears...and some very old grease... ...so we got as much of that gunk out as possible... ...then I started at the other end...and removed the little cover... ...which revealed a screw that holds the 'accelerator' on... ...and that revealed a slightly gunked up compartment...with what looks like some old old flour... ...I removed one more screw from the bottom with the little name/model plate... ...and started cleaning everything really well...some little areas were just too tight to get into...so I contrived a toothpick cleaner with my dremel tool...and it worked well for the little corners... ...but when I started chipping away at what I thought was more gunk on the handle... ...I realized that it was actually some sort of glue and that the handle had been broken and repaired at some time...I LOVE that...and I just cleaned it and left it alone... ...with everything all clean...it wss time to start masking things for painting...and I started with the decal which I really REALLY wanted to preserve...
...basically what I did was...
...starting in the middle of the decal with plain old scotch tape...I tucked under a corner so I could easily pull it up after...and then I made sure the tape extended beyond the decal...
...then using the exacto knife I trimmed that off right to the edge of the decal...
...with a second piece of tape I tucked under a corner and did the same thing in the opposite direction...overlapping in the middle...
...and finally I placed a piece of tape vertically over the pointed part of the decal and trimmed around that end... ...then using masking tape I taped over the rivets that I couldn't remove and wanted to leave silver... ...and trimmed around them with the exacto knife... ...I went to the hardware store and got some appliance paint...I thought the biscuit colour was the best match... ...set up a 'painting station' outside...a little snow doesn't keep me from painting...HA!... ...and sprayed all the parts... ...while the paint was drying...I measured the gap between the beaters and the mixer...the ebay discription said that although the beaters would work just fine...they would not eject because of this gap... ...so I went back to the hardware store and got some rubber washers to fill that gap...and some oil and grease for when I put the mixer back together... ...then after a couple of hours...I brought all the pieces right back inside after they were sprayed...it was a little bit chilly out...and I wanted to remove at least the decal masking before the paint got very dry... ...it was pretty easy to pull the tape off of the decal... ...I just grabbed hold of the tucked under corner and pulled... ...the last piece... ...I love it...nice crisp edges... ...NOW...for the single most gratifying part of the whole project...this is the little accelerator knob...kinda drab... ...so I raided the crayon bin for some white crayons... ...and started coloring in the letters...just rubbing the crayon really hard across the letters...to fill in all of the spaces... ...then I just took a paper towel...and rubbed the excess off of the bakelite... ...a pretty BIG difference... ...I did the same for the handle...I LOVE it! ...then it was just time to put everything back together...I had all of my parts clean and neatly arranged... ...and ta-daa... ...the finished re-furbished Mixmaster...
~Wishing you a lovely start to your week!


What a great re-do. Looks like new. I painted the body of an old crock-pot I wanted to take to a pot-luck and it turned out well too. Good Job!!! MOM
ReplyDeletehey, we've been busy, busy......i've gotten behind on my reading! cool and amazing process - glad it turned out so nice!
ReplyDeletelove, k
You've done a wonderful job of painstakingly refurbishing the mixer. I don't think I'd have the patience unless I had nothing else to do. Too finicky for me but you do such great work! Enjoy the mixer.
ReplyDeleteWow! I am amazed! I would never attempt something like that. My favorite was the white crayon that you added to the lettering - SO clever! It looks wonderful!
ReplyDeleteI know you posted this a long time ago but I just decided to paint mine today and you've inspired me!!! Crayon thing was a genius idea!
ReplyDelete