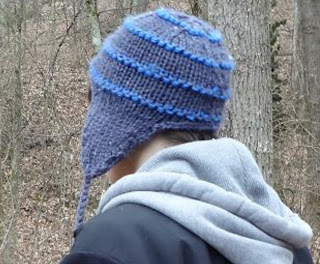
...a super simple snowboarding earflap hat pattern...
Earflap:
Cast on 5 sts on needle size US 13 with 2 threads Grey. K 1 row P 1 row and continue in stockinette st. At the same time inc 1 st each side on every other row a total of 2 times = 9 sts. Then inc 1 st each side on every 4th row a total of 2 times = 13 sts. Slip sts onto a stitch holder and make one more earflap.
Hat:
Cast on 3 sts on US 13 needle with 2 threads Grey, slip 1 earflap on needle (13 sts), cast on 14 sts, slip the other earflap on needle (13 sts) and cast on 4 sts (47 sts).
Purl back across all stitches. Knit one row with Grey – then knit one row with Royal – then switch back to Grey and continue in stockinette st for 5 rows beginning with a Knit row.
When piece measures 6 ½” from front cast on stitches dec 6 sts evenly on every other row a total of 4 times (23 sts), making sure to decrease in the same place on each row – you can use markers or just the countdown method…every 7 st…then every 6…etc. Continue until piece measures 9½” from front cast on.
Cut the thread, pull through remaining sts and fasten.

Sew middle back seam using invisible duplicate stitch seam.

...starting with the working yarn to the left stitch up through the last loop on the right then bring the yarn across the empty space and stitch down through the last loop on the left...then bring the yarn under this base stitch and down through the next stitch up to the right...then up through the next stitch on the left...and back down through the center...creating a duplicate knit stitch...then just start over from there...come up through the middle of the duplicate stitch ...etc...
...this photo shows the working yarn coming up through the center of the stitch...and down through the next stitch up to the right...

...then across the space and up through the next stitch to the left...

...and back down the center of the stitch below...and back up through the center of the new stitch...

...so then you'll have a grey duplicate stitch seam going up the center back...

...and we need to add the blue garter stitch to the seam...so turn the hat upside down...

...and just do an upside down duplicate stitch on the rows that have the blue stripe...

...do a single crochet border...

...around the entire edge of the hat...
.jpg)
...when you reach the bottom of each earflap add three double lengths of grey yarn...

...and braid them for about 12 inches to form the ties...

...then stitch in a polar fleece lining by hand...

...polar fleece is pretty stretchy...

...and there you have it...
...this pattern was super easy and on such big needles it was a really quick knit...
~Have a lovely day!


.jpg)


Great hat pattern, thank you for sharing. Now I just need it to snow here, just a little:)
ReplyDeletehow warm looking! and i see that you may actually need a hat for a while now! love, k
ReplyDeletei like it on his head. :)
ReplyDeletelooks like a cozy one!
Great hat, I shall keep that pattern for next year. I have very short hair and my ears get cold!
ReplyDeleteHi. I love the hat. How would you increase the size to fit a man with a large head?
ReplyDeleteThanks.